How to install Ubuntu Server on VirtualBox
Prequisites
- If you haven’t already, download and install VirtualBox.
Step 1: Download Ubuntu Server ISO
We want to download the official version from the Ubuntu Server download page. For this particular version we are using Ubuntu 22.04.4 LTS however any version should work. If new versions come out, I will update this post accordingly.

Step 2: Create a new Virtual Machine
In this step we will create a new virtual machine in VirtualBox. The important bit is that we are going to configure the machine with aqueate resources to run our development setup. The machine will be configured to act as a device on the network, so we can access it from our host machine.
-
Open VirtualBox and click on the New button.
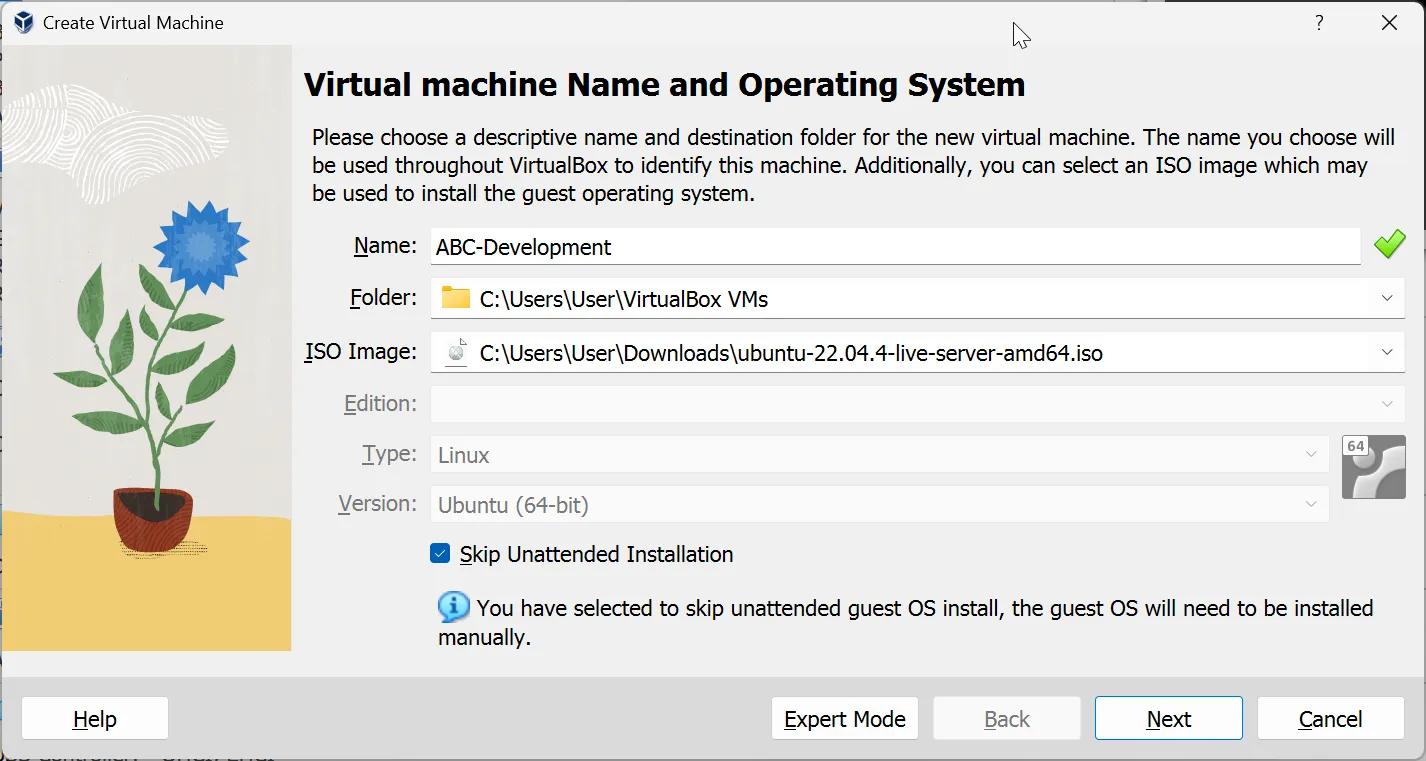 Please make sure that you skip unattteded installation as we will be installing the OS manually.
 -
Set the resources for the virtual machine. I recommend at least 4 CPU cores and 8GB of RAM (8192MB).
-
Create a new virtual hard disk and select about 50GB of space.
-
Finish and start the virtual machine.
Step 3: Install Ubuntu Server
- Set the VirtualBox window to scale mode and resize to your liking.
- Select
Try Ubuntuand pressEnter. - Select your language and press
Enter. - Select your keyboard layout and press
Enter. - Make sure to have
Ubuntu Serverselected and pressEnter. - The network configuration should be fine by default, press
Enter. - If required, set a proxy and press
Enter. Otherwise, leave it blank. - Wait for the mirrors to load. This may take a while. Then press
Enter. - Select the disk to install Ubuntu Server on and select
Done. The default option should be fine. - You will see the setup of the disk. Select
Doneto confirm. Optional: You can extend the logical volume to use the entire disk. - Select
Continueto write the changes to the disk. - Set the username and password for the system. Make sure to remember these. Set the server name to something that makes sense to you.
Upgrade to Ubuntu Pro, selectSkip for nowand pressEnter.- Press
Spaceto select the OpenSSH server and pressEnter. Important: If you forget to do this, you will not be able to access the server remotely. - Do not select any Featured snaps, select
Doneand pressEnter. - Wait for the installation to complete.
- Select
Reboot Nowand pressEnter. It may state that itFailed to unmount cdrom, this is fine. Do not worry.
Step 4: Accessing the server
- Power-off the virtual machine.
- Go to the settings of the virtual machine.
- Go to the network settings.
- Select
Bridged Adapterand select your network adapter. - Start the virtual machine.
- Find the IP address of the server by running
ip ain the terminal. Take note of the IP address. You will need it in the steps below. - Access the server via SSH by running
ssh username@ip-address. To do this, open up the terminal on your host machine and run the command. It should be something likessh username@192.168.1.xwhereusernameis the username you set up during installation and192.168.1.xis the IP address of the server from the previous step. - You should now be able to access the server remotely via terminal.
- Power-off the virtual machine once again.
- Run the virtual machine in headless mode by running
VBoxManage startvm "VM name" --type headlessfrom the command line. This will start the virtual machine in the background and you can access it via SSH from your host machine.
Step 5: Update and upgrade the system
- Access the server via SSH.
- Run the following commands to update and upgrade the system:
Terminal window sudo apt updatesudo apt upgrade
and follow the prompts to install the updates.
3. If a package configuration is required, select the default option by pressing Enter.
Step 6: SSH configuration for passwordless login
This is merely a convenience step to make it easier to access the server without typing the password every time. It is not required but highly recommended for ease of use.
How it works?
To be able to connect to the server without typing the password every time, we need to generate an SSH key pair on the host machine and make the server acknowledge the key by copying the public key to the server.
-
On the host machine, open up the terminal as administrator. If you ignore the administrator part, this will not work.
-
Navigate to the location where you want to keep the key. This should be a secure location.
-
Run the following command to generate an SSH key pair:
Terminal window ssh-keygen -t rsa -b 4096 -C "your@email.com" -
Press
Enterto save the key in the default location. At this step you will have two files in the location you specified:id_rsa: The private key. This should never be shared with anyone.id_rsa.pub: The public key. This is the key that you will copy to the server.
-
We need to tell windows to use the key for authentication.
Start the SSH-Agent in Windows by running the following command:
Get-Service -Name ssh-agent | Set-Service -StartupType 'Automatic'Start-Service ssh-agentAdd the key to the authentication agent by running the following command:
ssh-add path-to-key/id_rsaThis will add the key to the authentication agent.
Now we need to tell Ubuntu about our key. Copy the public key using following powershell command:
Get-Content ~/.ssh/id_rsa.pub | Set-ClipboardYou should now have the public key in your clipboard.
- Connect to the server via SSH and run the following commands:
ssh username@ip-address # replace username and ip-address with the values from the previous steps
cd ~/.sshnano ~/.ssh/authorized_keys-
Paste the public key into the file and save it. Press
Ctrl + X, thenYandEnterto save the file. -
Exit the SSH session.
-
Connect to the server again via SSH. You should not be prompted for a password from now on.